I'm putting guitar and ukulele in the same lesson for one simple reason: They share a lot in how you tune. I say that for those who start on one instrument and then move to the other. Many a guitarist has picked up a ukulele, felt completely baffled, and put it back down usually muttering some immature notion such as "those are cute toys." (If you say that, I will unfriend you.)
Lets start with guitar. Standard guitar tuning is E A D G B E (from low to high). You can use an acronym to remember the tuning if you would like. I like the one "Elephants And Donkeys Grow Big Ears". Now, for tuning, we always want to start at the lowest note (fattest string) and work our way up. (This is because the bass supports the rest of the music.) See below for more info on how to get that first note tuned.
Now, once you have that first note tuned, you can use the guitar to tune itself. This is a very useful method for not only quick tuning between songs, but also for developing you ear to hear different tones. First, count up five frets from the nut on the low E string and strum that note. This will be the note A that you should tune the next string to. You can count up this way to get the notes for the next few strings too. But, once you get to tuning the B string, you need to count up only four (not five) to do this. For the last string, count up five from the not on B string. Here's a diagram:
Ukulele
Ukulele is only a little different. We can still use the same idea to tune it to itself, we are just going to use different pitches. Now, at this point, it is important to point out something that usually throws a few people off. The ukulele has several different options when tuning. The standard tuning is what we call C6 tuning. However, even the standard has two flavors: linear and re-entrant.
Linear tuning means that we tune all of the strings in order from low to high.
Re-entrant tuning means that we start with a higher string, then go down to a lower string and proceed up the scale. Five string banjo also uses this type of tuning. This tuning also gives ukuleles the characteristic "My Dog Has Fleas" sound.
Whether lenear or Re-entrant, the order of notes is the same in C6 tuning (which we will refer to as standard tuning). The notes are G C E A. The G string is the one which we either tune low (linear) or high (re-entrant).
Since re-entrant is the most common tuning, I will show you how to do "self-tuning" in that style. First, we want to tune our lowest string which will be not the G, but the C string (again, see below for tips on getting that note tuned). Then, we count up 4 frets to get the note for the next string which is E.
Now we will regress to tuning the G string (which we skipped). Count up 3 frets from the nut on the E string will give us the G we are looking for. Once you have that in tune, count up the E string two more (a total of 5 from the nut) and you have your A for the A string.
Here is a diagram:
Tuners
Seventy years ago, there weren't many options for tuning an instrument. You usually found a piano or other instrument that you could tune to. If you were the typical upper middle class home, you'd just use the piano. If you were in poverty, you did your best to tune it by ear. Now-a-days, though, there are tons of options for tuning your instrument.
 |
| A Guitar Pitch Pipe |
The first is still old school, but I highly recommend it for reasons of training your ears. A pitch pipe as they are called can be bought for whatever instrument you are tuning or even a chromatic one with several pitches. You simply blow on the desired pitch and tune the instrument by ear. Most came with multiple pitches so you didn't have to tune the instrument against itself. Aside from needing to tune by ear, the downside is that if the pitch pipe was out of tune, your instrument was out of tune.
There are also several websites that have "online" pitch pipes. This can be a good option if you have speakers and often play in front of your monitor.
 |
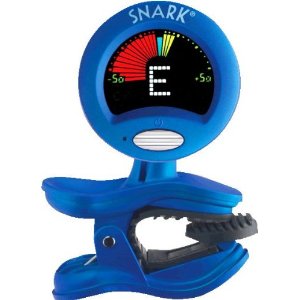
| Snark Clip On Tuner |
Clip on tuners can run from $10 up to $250 depending on who made them and if the come with any other functions or extras. My experience is that a $20 or $30 tuner will last a lifetime if not abused and get you as in tune as you need.
However, if you play an electrified instrument two options outside of the clip on are a tuner that you can plug in to the output cable or an on-board tuner. The "in-line" tuners are great if you are already using effects petals. It makes tuning pretty simple and can even help by "turning off" your instrument. The on-board tuners are tuners added directly to your instruments on-board electronics. They aren't available to every instrument, but are a wise upgrade if you are buying a new instrument from the factory.
So, that's all I have to say on tuning in this lesson. As I mentioned before, mastering tuning is a critical step to mastering any instrument. I highly recommend you learn not only how to use electronic gadgets, but also how to tune by ear. The better you can recognize that you are in tune by ear, the easier it will be to know you are out of tune.


No comments:
Post a Comment