Showing posts with label ukulele. Show all posts

Friday, March 6, 2015

Ukulele, Guitar, and Music Notation Software

I cleaned out one of my music folders today.  The one that I use primarily for beginner uke workshops.  I recycled about two pounds of paper.  I feel bad about the waste, but it's kind of what happens when you are a uke instructor.  People constantly "give" you more and more music.  Most of which is either not good for what you are doing or has a lot of errors.

The plus side is that now the folder is clean again and only contains what I use to teach.  The next step is a further redesign of the course (which I've already sketched out).  This will put me in front of the computer making lead sheets and chord diagrams along with writing out exercises and organizing things that way.

Just as an FYI, I thought it would be good to describe what I use for all this mess.  The unfortunate thing is that most software for music is expensive.  I would love to own a copy of Sibelius or another high end notation software, but I'd also like to pay off debt, feed my family, and put gas in my car.  I have cobbled together a modest collection of software that does about 90% of what I want.

Neck Diagrams

This is a great software that isn't crazy expensive.  It does a few things like designing page layouts and helping to create books of music work.  What it excels at (and is about the only good thing out there for) is making neck diagrams and charts.  The biggest downside is that it has no notation or tabbing ability.  But, you can easily import images of tab and notation and organize it on the page.

Noteflight.com

Noteflight.com is such an awesome community notation website.  It is a very powerful tool for creating notation music charts.  Lots of variables to make layout look good.  It is limited in some of the layout and that there is no ukulele tablature nor is there any chord diagrams.  But, you can sign up for a free version to get you started or pay a monthly fee for unlimited access.


Guitar Pro 6

This is probably the best compromise between the need for chord diagrams in a score, music notation, tablature, and multiple instruments.  It's extremely powerful and rather easy to use compared to some of the other notation softwares out there.  And it doesn't break the bank by comparison.  Sure, it's limited (just like everything is).  The biggest negatives are in text size of lyrics and the slash notation not being available in the standard notation (minor pet peeve of mine).  Overall, though, it's great.

Things I Would Like


If there are any developers out there that want to make a musician happy, here are a few things that lack in most software that I really wish I had:

  • Ability to take notation with chords and lyrics and create a lyrics and chords only lead sheet.  I think this is a feature in some software, but it is very lacking in most.
  • Drag and drop stuff around.  Let me tell you where I want to put that chord diagram!!!
  • Line by line exporting.  It would make it so much easier to write a music book if I could just export a line at a time to a small image file.
  • Fully customizable tablature.  Some do this, most limit to guitar and/or bass.  Even when you have customization in some, it's limited to some "standard" tunings.
  • Capo ability.  We all use them, let me notate it.


There are more out there, but for the most part, this is what I use.  Add in the occasional use of word processing software and image software and that makes up the majority of my creative music suite.  And I got all of mine for much less than the $500 price tag of the big notation softwares.

Saturday, November 1, 2014

Should You Learn to Read and Write Music?

Go out to a guitar or ukulele forum right now and post this question.  Wait about an hour and look at the responses...  I'm betting that you have just started a forum war.  Half with say you should, while the other will say you shouldn't.  Both opinions will likely not answer the question for you.  And, at the end of the day, you will still struggle with the question in your own head.

So, here's my take:

I've never met a musician who learned to read and write music who said it was a waste of time.  This is true of all instrumentalists: guitar, ukulele, piano, trumpet, accordion, etc.  It has always been a rewarding pursuit.

That said, to be proficient at it, you will have a lot of work ahead of you.

Why it's a good idea:

Basically, it boils down to communication.  If you cannot effectively communicate your musical ideas to other musicians (or to your future self), then you are setting your music up to fail.  reading and writing music is how we communicate "off instrument".  Words don't work for us.

Think about it like music is a foreign language, like Italian. You can listen to tapes and learn to speak the Italian, but as soon as you are reading the menu at a cafe in Venice you are going to be at a loss because you never learned how to read those words properly.  Sure, you might stumble through it, but there will be a loss in translation.

Music is no different.  You can listen and learn how to play a tune, but as soon as you are trying to get your point across to other musicians off instrument, you're lost.

Amateur vs. Professional

Obviously, in the guitar and ukulele world (and many other fretted instruments) there is clearly no emphasis on reading music efficiently.  We are only really expected to read chord symbols and lyrics off of a chord sheet and that's about it.  And that is totally fine.  There is NOTHING wrong with being an amateur musician.  Keep it simple and keep it fun.  That's the point!

But, if you are a budding professional musician, then you need to dedicate yourself to understanding the craft.  Sure, you can play "All the Things You Are" with a beautifully crafted chord melody and bass line.  However, can you communicate what you are doing so the rest of your band can understand where to come in?

Maybe you intend on being a soloist your entire musical career... That's fine too.  Nothing wrong with that.  But, as many musicians will agree, your future self is very forgetful.  Having a way to document how you did something makes remembering it later as easy as reading.

In the long term, learning to read and write music is a great skill.  If you only get into it a little as an amateur musician, that's fine.  But, as you work your way towards being a musician of professional quality, it is essential that you can communicate with other musicians.

~Danny

P.S.:  There is another reason you should learn to read music: money.  There are literally thousands of musicians out there that are trying to get noticed.  Being able to read off of a piece of sheet music will get you noticed.  Getting noticed gets you hired!  I've had a few jobs that came to me because I could read and the other guy couldn't (these were musicals).  It is worth it!

Tuesday, July 15, 2014

Brown Out, Light Bulb Comes On

Music accomplishments seem to come from nowhere.  Tonight (Tuesday night) I was sitting at my church waiting for the ukulele jam I host to start.  I was early, no one was around, and a brownout hits the church.  Dark, holding my uke, Mary (Kala Tenor), in the basement and I can't see.  After a minute of fumbling my way towards the light, I end up sitting on the steps in front of a door waiting a few minutes for the lights to decide to come back on.

Screw it, I'm here by myself, let's do something weird to practice.  I start playing "Exactly Like You", one of my favorite tunes, and working out a solo.  I've long noticed how I can sub in notes not in the regular key (I play ELY in C major) to create some cool tension in the solo.  However, some of the talk about modal improvisation was really lost on me.  I'd taken a couple workshops and woodshedded modes for hours, but I just never got it to click.

The lights came on...  About that time, I decided to play a solo over the A section using all seven of the modes of C one at a time.  This is going to sound abstract if you aren't familiar with the modal system, so here is a quick overview:

Modes are just the major scale starting in different places:

C Major/Ionian C D E F G A B
D Dorian D E F G A B C
Phrygian E F G A B C D
F Lydian F G A B C D E
G Mixolydian G A B C D E F
A Aeolian A B C D E F G
B Locrian B C D E F G A

You can also keep them all with the relative same starting note (they'll just be in a different major key):

C Major/Ionian C D E F G A B
C Dorian C D Eb F G A Bb
Phrygian C Db Eb F G Ab Bb
C Lydian C D E F# G A B
C Mixolydian C D E F G A Bb
C Aeolian C D Eb F G Ab Bb
C Locrian C Db Eb F Gb Ab Bb

That is the theory anyway, I have trouble thinking all of that nonsense, though when I play.  I learned long ago to think about it instead in terms of the numbers.  Basically, 1 is major, 2 is dorian, 3 is Phrygian, etc.  That and look at it on the fretboard in a certain way.  Let me show you what I mean:

If you are really paying attention, you will notice that there are only five different shapes/fingerings here.  That is the part of the point, you can go a long way only using those five shapes for soloing.

Now, back to the light coming on...

I played "ELY" while using each of these shapes (one at a time).  So, I only used notes from these shapes.  Some sounded great, others sounded good occasionally, some I just couldn't make it sound good.  But, the effect was tremendous to me.  Each of the different modes had it's own flavor and each left me feeling a different way about the mood of the tune (even when that wasn't the most pleasant sound throughout).

A next step for me was trying to play different shapes over different chords, but still thinking about it being a mode of C.

For instance, the A section of "ELY" is:

| C / / / | C / / /  | D7 / / /  | D7 / / /  | G7 / / /  | G7 / / / | C / / /  | C / / / |

(You could add a turn around at the end if you wanted...)

Over the C major chords, I played either a major/ionian shape or a dorian.  Over the D7 I played lydian and over the G7 I played mixolydian.  This is by no means a set in stone approach, but it gave me a new way of toying with the solos I was developing.

In swing, solos have to hint or reflect the melody.  If we get to far off of that, the listeners (and in many cases, the dancers) get lost and we don't want to loose them.  The idea I'm playing with above is a little departed from the basic melody, but when you look at the melody of "ELY", you find that in many points along the tune it follows much of the same ideas.  In fact, I kept finding myself resolving to melody notes as I worked through my newly crafted solos.

Now, I want to fast forward to around 8:00 as we were doing our jam.  My ukulele group is light on soloists.  Most of the players are strummers and they like to sing along if they know the words.  (And let me be absolutely clear that there is nothing wrong with that.)  So, I am often the one who gets called to take a solo when it comes around.  And when we played the great Hank Williams tune "You're Cheatin' Heart", I was chompin' at the bit to get my solo in.

It was rough at first as I started straight in on the new idea and didn't let the melody in.  Once I did, I started jumping off for just little fills on long holds.  Before I knew it, I was in and out of modes quick, using all of my fretboard, and generally playing one of the funnest solos I've improvised in a long time.  All in the key of A (which I hadn't tackled yet; remember "ELY" is in C)!

So here is the conclusion: Melodies are the hardy soup base for solos.  But the spices and hardy stuff comes from knowing how to use those scales.  So, practice both and do things that seem weird at first.  It will eventually turn on the light.

Wednesday, March 5, 2014

Lent Writing Challenge 1 of 40

So, in addition to multiple other personal things I'm doing for Lent this year, I've also decided to challenge myself in song writing.  I've never really done much song writing before. But, I've always wanted to.  In order to jump start myself a bit, I'm going to do 40 songs, 1 a day, through Lent.  Since today is Ash Wednesday, I've started early.  Take a listen:


Copyright 2014 by Danny Fowler

Saturday, March 1, 2014

Guitar vs. Ukulele: Personal Reflection

A week ago I spent Wednesday through Sunday at my first national music event: The Folk Alliance International Winter Music Camp and Conference.  I can't tell you how much of a blast I had.  Not only did I learn a ton, but I felt like a very respected member of the teaching staff for the camp.  Tons of friendships and contacts were made, and a new step in my career was made.

Over the last week since then I have had two out of three gigs and tons of time trying to absorb the many notes that I took that week and made since.  I've already logged something close to thirty (that's 30) hours this week in music between playing, practicing, and writing.  In all of this, I have also been reflecting a lot.

In particular, I've been reflecting on my time spent on guitar vs. my time spent on ukulele.

Honestly, I love both instruments, but as a musician I am constantly forced to do two things very well:  Play my instrument and create an image.

I can play both guitar and ukulele well, but ukulele comes much more naturally to me.  It seems like everything from rhythm to melodies lay out in a much more logical way.  Which is crazy, I know, given how similar the instruments are.

As for image... Well, let me just say that one of my favorite gigs, Headrush, talks more about my ukulele music than about my guitar.  Even my mom likes my ukulele more than my guitar.

I don't want you to get the idea that I'm giving up guitar for ukulele.  Far from it.  My work at my church alone will keep me playing guitar quite a bit every week.  Add in the musicals I do and the fact that I just really like playing jazz guitar, and I'll be keeping up with it.

But, as my forte performance instrument... I've decided to finish the Koolaide and go full on with ukulele.  I'll be focusing more time on that instrument and working more and more on the arrangements for my gigs.  I'll also be doing some recording and notation which I will share with my blog here.  The end goal: Building my brand as a ukulele player.

~Danny

Wednesday, January 29, 2014

Finger Nails

Most guitar and ukulele musicians realize that nail care is a part of being a good musician.  However, very few of us play often enough to need to think beyond just keeping yourself well groomed.  I know of a several musicians that keep a nail care kit that has a clipper and a file in their case or gig bag.

But what happens when you play a lot?

Well, by a lot I mean two or more hours a day, every day.  That is close to what I average.  Some days, it seems more like I will get a four hour day in.  This can be rough on your nails.

The way I strum ukuleles is by using the top of my index finger for down strums (and the pad for up). Even on nylon strings this can wear down a finger nail quickly.  In addition, I noticed recently that when I play guitar, I tend to graze that same nail across the top of the strings even when I am using a pick!

It is because of this that I started asking the wonderful ladies in my life about nail care.  Guys, you won't believe the amount of good info the ladies have on nail care.  It's kind of impressive!  After this "research", I've come up with a few habits that guitarists and ukuleleists should have when it comes to nail care:

The 4 Nail Care Habits of Effective Musicians
  1. 1. Moisturize - You'd be surprised how much just keeping your hands well moisturized will help with your nail health.  
  2. 2. Vitamin E - Using a nail specific vitamin E application will keep the nail bed healthy and strong.
  3. 3. Trim Them Often - Everyone's nails grow at different speeds.  If you are like me, you should plan on trimming them weekly, not just when the "need it".
  4. 4. Hard as Nails - Lastly, when you find out that you have a nail that gets worn more than the others, use a product called Sally Hansen Hard as Nails with Nylon. It will keep them hard and won't wear off near as much as the nail itself.

Other Tips

A lot of players use the press on type of acrylic nails.  Everything I have read about them makes me cringe.  The talk is that your nail will eventually get a fungus and fall off.  I'm guessing you don't want that.

If you really need the longer finger nails for picking (and some do), my advice is to go to a salon and tell them you are a guitarist/ukuleleist and that you need only one hand (or so many fingers) done with gels.  Gels will last a while.  Once you are used to them, you can probably invest in the equipment (lamp, applicator, etc) to do them at home.

Of course, all of this is for your right (picking) hand.  For your left hand, the best thing is to keep them short and clean.  I've had students before who had longer finger nails and liked getting them done up.  Hell, Dolly Parton performed with strangely long nails!  But, you aren't Dolly Parton.  Odds are, if you have longer nails, they are getting in the way.  Make the sacrifice and cut 'em down.  You'll thank me later.

~Danny

Sunday, January 12, 2014

Folk Alliance Music Camp: Getting Closer

As I've been getting closer to the February Music Camp, I've been refining my Swing Guitar Lesson and getting more and more excited.  Then, the other day I get in contact with one of the organizers and discover that not only will I be giving a workshop on Swing Guitar, but I will also be doing one on Swing Ukulele (as well as leading a few Ukulele jams).

No details are set yet, but I've already had to send in a synopsis of each lesson.  The trick was, I'm don't really have the Ukulele workshop written yet!!!


Now, I'm scrambling a little to get my draft finished so I can iron it out.

The cool thing is, I've never really thought about Swing Ukulele the same way I do Swing Guitar.  Because of the regular repertoire inherent in the Ukulele culture, which is very saturated with swing tunes as much as it is with folk and classic rock, I've always felt Swing Ukulele was sort of a natural part of any Ukulele player's repertoire.

But, now I'm really looking at it.  I'm breaking down what I do already and what I find myself working on in this genre.  What I'm finding is that there really are some differences between just playing Ukulele and playing Swing Ukulele.  What is even more astounding to me is the amount of differences I've finding between Swing Guitar and Swing Ukulele!

Eventually, I'll post a lot of my findings and ultimately my lesson here.  But for now, I think I need to concentrate on writing and polishing both lessons and getting ready for the upcoming awesomeness of the Folk Alliance Music Camp!

~Danny

Tuesday, May 21, 2013

Warming Up

Recently, a guitarist I admire a lot put me in my place.  Not in a bad way, but he reminded me that I need to follow my own advice and not be big headed about what fundamentals I should be working on.  He did this with one of the easiest technique building exercises out there.  One that I had been prescribing to students for years.

I'm going to refer to it the same way he does:

The Warm Up

Simply put, the Warm Up is an exercise that is mostly non-diatonic (so it doesn't follow a regular scale) and is more about developing good left and right hand technique and less about music theory.  In fact, I'm pretty sure we can ignore music theory for a minute on this one.

We will start at the lowest string (E for guitar, G for ukulele*) with our index finger. Number off your fingers from index to pinky as one two three four.  This should correspond to the first four frets of the instrument.  So, first finger, first fret and so on. Now play the tab below:


Notice that we are moving ascending chromatically up each string four notes regardless of any music relation.

The point here is not to make music, although you can do it in a rhythmic way.  The point is to develop our left hand fingers' touch and the tone we get on the instrument.  Also, we can either pick or finger pick the strings and work on our right hand technique as well.

Now, once we have done this up to this point, we need to move back down the strings again. Before we do this, we slide up one one fret. Then, play your way down in the following fashion:


Dave: Wait, why don't you descend chromatically on each string as you come back down.

That was actually a question I got.  Like how I did that?

You can do that if you want.  But, by following the pattern above, you are breaking your fingers up from thinking going-down-a-string-is-always-descending.

Now, once you have gotten to the highest point you are comfortable playing (something like twelve or fifteen frets; maybe ten if you are on a soprano ukulele) we need to come back down the neck.  We'll do this in a similar fashion, only this time we will descend on each string. So, it will look like this:

This time, we are descending.  As you guess it, we will work our way back up the strings again in a descending chromatic manner.

The Good Part

So, this is a good exercise and I encourage you to do it slowly and thoughtfully at first trying to get your fingers doing things right rather than fast.  Once you can work your way up and down without any mistakes, you then want to get out our good friend Mr. Metronome.

The examples I have for you above are in eighth notes.  Playing at a slow speed, say 60 bpm to start, work through the exercise up and down without stopping.  Once you can do this in time at whatever speed you started at, move up a few clicks (like say 63 in our example) and try it there.

The goal with developing speed is starting slow.  You need time working something slowly to get the muscles in your hands working together and using their memory (muscle memory) first before you can speed up.

Bonus

Four bonus for today:

1) After going up and down, take a moment to stretch out the muscles in your fingers and hands.  Think like you are a soccer player.  You would end up with a major injury if you walked out of your locker room and started playing a game without a warmup and stretch.

2) Do this every day to build it up.  You don't always have to start slow.  You will know where to start as you get more proficient, but always start at a slower speed than you are wanting to work up to.

3) To work on your swing rhythm, try using the metronome as if it is only clicking on beats 2 and 4.  So if you are wanting to go 100 bpm, you need to set it at 50 bpm.  Then count 1, click, 3, click to get yourself moving. This will be hard and suck at first, but it will payoff loads later.

4) Finally, the patterns of up and down that I gave you above are a starting point.  You can, if you feel up to it, work on alternating fingers in inventive ways.  For instance, instead of 1, 2, 3, 4 try 1, 3, 2, 4 going up and then 4, 2, 3, 1 going down.  Mix it up and make those fingers start to think for themselves!

* Yes, I know that re-entrant tuning that would not be the highest string.  Let's imagine that you have a low G tuning for a minute.  Also, ignore the possibility that you own a baritone uke.

Friday, October 21, 2011

Music Lesson 2: Tones, Semi-Tones, and the Major Scale

Now that we have a basic understanding of the Chromatic Scale, lets take a look at note relationships and the Major Scale.

Tones and Semi-Tones

As we move our way up the Chromatic Scale and back down we are moving in a specific order between the notes.  Now, every time you move from one note to another you are moving in what is called an Interval.  The term Interval is just a fancy name used to describe the relationship between two notes.  For this lesson, we are going to focus on two types of Intervals.

The most basic of these Intervals is called a Semi-Tone.  On our Chromatic Scale, we are moving one Semi-Tone at a time (or half step as we called it before) as we move up and down the scale.


Notice, as we discussed in the previous lesson, that as you move up or down the Chromatic Scale you are also moving one fret at a time (this applies to guitars, ukuleles, and any other fretted instruments* such as mandolin).


Now lets double the Semi-Tone.  When you add two halves, you get a whole, right?  (I hope you know this already...)  Well, when we do two half-steps, it becomes a whole step or one step. And when we do two Semi-Tones, we get a Tone.

As we move up or down the neck of our instrument(s), this means we are moving two frets each time.  So, let's try to move from C to C up the neck only in Tones.


Do you see what happened there?  In six steps we got to our next C.  Also, we ended up with a bunch of sharps (or flats depending on if you go up or down).  We haven't really discussed keys yet, but a general rule is that the key of C has no flats or sharps in it.  It's all natural!

The Major Scale

So, we need to make our way from C to C (up and then back again) while doing two things: not hitting any sharps or flats, and using each natural note in the scale.  When we do this, we get the following:


Now, let's compare this to the Chromatic Scale we learned in the previous lesson.


Notice how we skip all of the sharps/flats and move in a specific order.  Let's look at this in relation to Tones and Semi-Tones.


This formula of T, T, S, T, T, T, S is what we call the Major Scale Formula.  Moving in this manner is also called Diatonic.  For now, just think of Diatonic as meaning alphabetical.  Using this formula, you can now start on any note and find any scale!!!


Now, let's relate this to our fret boards.  Here is the C Major Scale on the ukulele and the guitar.


And here is the same scale with us jumping to different strings when we can.


One of the great things about fretted instruments is that you can move things around very easily from one note to another just by shifting to another fret.  With our Major Scale, we need only start at another spot and use the same pattern to generate new Major Scales.  In future lessons, I will show some of the many different scale patterns or fingerings that exist.  These will come in handy.  For now, try to find different ways of fingering different Major Scales up and down the neck.

Note:  For ukuleles, major scale patterns can be a little restrictive in regards to the different ways you can finger them.  This is because most ukuleles are tuned in reintrant tuning and your primary strings for the pattern will be limited to three strings (the C, E, and A strings).  If you are using linear tuning (also known as low G tuning), then it will be easier to come up with multiple Root to Root scale patterns since you now have four strings to work with.  I'll try to shed some light on this in the later lesson.

~DB


* Some exceptions of this include mountain dulcimer.  There are others in more exotic music styles that do not follow this rule.  However, in general, this is true for fretted instruments.

Tuesday, October 11, 2011

Music Lesson 1: Chormatic Scale

So, for lesson one I'm going to start out at the bottom of music theory: The Chromatic Scale.  This scale encompasses all the notes in one big shot, but at the same time illustrates a lot of the relationships between the notes.

It is important to understand that everything you learn in music builds off of what you learned before.  Sometimes things don't need a specific order, but most things do.  The further you get out of order, the harder a concept will be.

For this lesson, we are going to use the root and key of C.  Roots and keys will be described in much more detail in later lessons.  For now, just understand that the key of C is the easiest for us to work with.

The chromatic scale uses every note between the root note (in this case, C) and it's octave (or the next time that note comes up in the scale).  So if we start at C, we work this way:


C C#DD#EFF# GG#AA#BC


This pattern is constant regardless of what root note you start with.  As we move from one note to another, each move is down by a half step.  The half step is the shortest distance between two notes*.  As an additional example, here is the chromatic scale for the Key of E (wheel use it later on the guitar):


EFF# GG#AA#BC C#DD#E


As you can see, we are also only using sharps (#) as we go up the scale.  It is also acceptable to use flats (b) instead of sharps.  However, we typically use sharps when we ascend (go up) the scale and flats when we descend (go back down).  Here is the same scale (in C) going down with flats:


C BBbAAbGGb FEEbDDbC


As you may notice, where there was a C# going up, we now have a Db.  That's because the sharp (#) makes the indicated note a half step higher and the flat (b) makes it a half step lower.  Since D comes after C, a Db is the same as a C#.

There is another thing to take note of with this scale.  Notice how the scale moves between E and F and also B and C.  Normally, on the scale, if move from one note to another, you would use a sharp (going up) or a flat (coming down) to go that half step between.  Well, there is not half step between E and F or B and C.

So, here is what you need to remember about this lesson:
  • Chromatic scales move one half step at a time from root to root (an octave).
  • When we move up, we sharpen the pitch so we use sharps (#).
  • When we move down, we flatten the pitch so we uses flats (b).
  • A Bb and an A# are the same pitch (as are other flat/sharp neighbors).

The practical side


Now we need to take this knowledge to the fretboard.  For ukuleles, we will use the C chromatic scale, for guitars we will use the E chromatic scale.

Notice as you work your way up and down the fretboard chromatically, you are also only moving one fret at a time.  This is because on fretted instruments (this includes the guitar) each fret represents one half step.

Now lets look at switching to a different strings instead of staying on one.


This is a good illustration of how tuning your ukulele or guitar to itself works.  As you can see, the notes blend themselves into the next string.

Finally, here are both fretboards laid out up to the twelfth fret with all of the notes.  Try to start at one note and work your way up and down the fretboard doing a full chromatic scale.

Now that you have a good understanding of the chromatic scale, we will move on to the next part of music which is tones and semitones.  We'll use this scale to do so, so make sure you know how it works before moving on.

~DB

* When I talk about music, I talk about western music (as opposed to Eastern or African or Tribal music).  In this case, there are some instances in other forms of music that use steps that we would call quarter or even smaller.  But for our purposes, we assume that a half step is the smallest.

Guitar and Ukulele Tuning

Tuning your instrument is one of the first skills you should master when learning how to play.  If you are lucky, you'll pick an instrument like piano that has to be tuned by a professional and therefore gets you off the hook of learning.  But, you probably aren't that lucky since you are here to learn.

I'm putting guitar and ukulele in the same lesson for one simple reason:  They share a lot in how you tune.  I say that for those who start on one instrument and then move to the other.  Many a guitarist has picked up a ukulele, felt completely baffled, and put it back down usually muttering some immature notion such as "those are cute toys."  (If you say that, I will unfriend you.)

Lets start with guitar.  Standard guitar tuning is E A D G B E (from low to high).  You can use an acronym to  remember the tuning if you would like.  I like the one "Elephants And Donkeys Grow Big Ears".  Now, for tuning, we always want to start at the lowest note (fattest string) and work our way up. (This is because the bass supports the rest of the music.)  See below for more info on how to get that first note tuned.

Now, once you have that first note tuned, you can use the guitar to tune itself.  This is a very useful method for not only quick tuning between songs, but also for developing you ear to hear different tones.  First, count up five frets from the nut on the low E string and strum that note. This will be the note A that you should tune the next string to.  You can count up this way to get the notes for the next few strings too.  But, once you get to tuning the B string, you need to count up only four (not five) to do this.  For the last string, count up five from the not on B string.  Here's a diagram:


Ukulele

Ukulele is only a little different.  We can still use the same idea to tune it to itself, we are just going to use different pitches.  Now, at this point, it is important to point out something that usually throws a few people off.  The ukulele has several different options when tuning.  The standard tuning is what we call C6 tuning.  However, even the standard has two flavors: linear and re-entrant.

Linear tuning means that we tune all of the strings in order from low to high.

Re-entrant tuning means that we start with a higher string, then go down to a lower string and proceed up the scale. Five string banjo also uses this type of tuning.  This tuning also gives ukuleles the characteristic "My Dog Has Fleas" sound.

Whether lenear or Re-entrant, the order of notes is the same in C6 tuning (which we will refer to as standard tuning).  The notes are G C E A.  The G string is the one which we either tune low (linear) or high (re-entrant).

Since re-entrant is the most common tuning, I will show you how to do "self-tuning" in that style.  First, we want to tune our lowest string which will be not the G, but the C string (again, see below for tips on getting that note tuned).  Then, we count up 4 frets to get the note for the next string which is E.

Now we will regress to tuning the G string (which we skipped).  Count up 3 frets from the nut on the E string will give us the G we are looking for.  Once you have that in tune, count up the E string two more (a total of 5 from the nut) and you have your A for the A string.

Here is a diagram:

Tuners

Seventy years ago, there weren't many options for tuning an instrument. You usually found a piano or other instrument that you could tune to.  If you were the typical upper middle class home, you'd just use the piano.  If you were in poverty, you did your best to tune it by ear.  Now-a-days, though, there are tons of options for tuning your instrument.
A Guitar Pitch Pipe

The first is still old school, but I highly recommend it for reasons of training your ears.  A pitch pipe as they are called can be bought for whatever instrument you are tuning or even a chromatic one with several pitches.  You simply blow on the desired pitch and tune the instrument by ear.  Most came with multiple pitches so you didn't have to tune the instrument against itself.  Aside from needing to tune by ear, the downside is that if the pitch pipe was out of tune, your instrument was out of tune.

There are also several websites that have "online" pitch pipes.  This can be a good option if you have speakers and often play in front of your monitor.

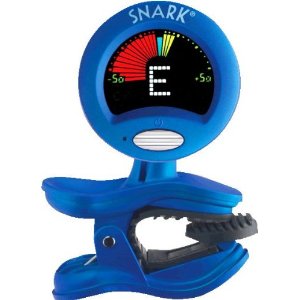
Snark Clip On Tuner
In our electronic age, the best method is the electronic tuner.  Twenty years ago, electronic tuners were still in their adolescence and relied on a poorly constructed microphones to pick up the sound your instrument made.  They progressed to plug in ones for electrified instruments, but those got expensive quick.  As digital electronics got better and better, the clip on tuners have hit the scene and changed the way we tune.

Clip on tuners can run from $10 up to $250 depending on who made them and if the come with any other functions or extras.  My experience is that a $20 or $30 tuner will last a lifetime if not abused and get you as in tune as you need. 

However, if you play an electrified instrument two options outside of the clip on are a tuner that you can plug in to the output cable or an on-board tuner.  The "in-line" tuners are great if you are already using effects petals.  It makes tuning pretty simple and can even help by "turning off" your instrument.  The on-board tuners are tuners added directly to your instruments on-board electronics.  They aren't available to every instrument, but are a wise upgrade if you are buying a new instrument from the factory.

So, that's all I have to say on tuning in this lesson.  As I mentioned before, mastering tuning is a critical step to mastering any instrument.  I highly recommend you learn not only how to use electronic gadgets, but also how to tune by ear.  The better you can recognize that you are in tune by ear, the easier it will be to know you are out of tune.

Tuesday, September 27, 2011

Collectors

A few days ago before a lesson I was standing at the uke wall in Guitar Syndicate plucking away and tuning up the ukes like I tend to do.  Eventually, and older fella walked over and commented that he had about that many ukes at home himself.

"Oh," I said, "Have you even considered joining our ukulele club?"

"No, I don't really play them that much," he retorted.

Since I was a lot younger I've noticed that there are tons of instruments wasting away in collections all over the world.  Now, museum pieces and items beyond repair aside, I have always felt a little guilty about this.  Instruments have a purpose, and that is to make music.  So many of these instruments haven't seen the light of day or felt the touch of a musicians capable hands because they are in such collections.

I'm not exempt from this crime.  I have at a small collection of wind instruments that get brought out on rare occasions that I just don't seem to be able to part with.  Sentimental as my feelings are (one is my trombone that was my best friend in high school, and the other is my dad's coronet he played in high school), it would be nice if they got played once in a while.

So it is that I find myself talking more frequently to collectors as I spend more time at the local shop.  They always have a story on the guitar they let go, and can play a few Eagles or Hendrix licks better than even the most astute starving artist.  And they keep the guitar shops and manufacturers in business.

That's right, we the penniless musicians owe them a lot.  For every rare archtop or Les Paul they keep out of our hands they encourage a hundred more inexpensive models to be produced, bought, sold, and re-sold used to slip into the market.  If not for them, we would not have such wonderful guitar lines such as the Ibanez Artcores or countless Strat and Tele copies.

So, I keep talking to them.  I pick their brain as they tend to also be the heralds of much guitar (and ukulele) history.  And, occasionally, I work on that invite back to their museum/garage where their little studio is full of 30 guitars and 12 ukuleles.

~DB

Tuesday, August 16, 2011

Setting Up

One of the hardest things to get into my head for the first few years of playing was the importance of correct setup of my guitar.  I figured, like most people, that guitars came like most anything else: ready to go.  Unfortunately, that can't be further from the truth.  Guitars, bass guitars, ukuleles, and most instruments need a qualified luthier or technician to do some adjustments to the instrument to make it ready to play.

Most manufacturers will do there best to make them playable out of the box.  But, when you ship an instrument and bump it around a bit, the parts are going to get a little squirrely.  Even more, weather and climate changes can literally change the shape of an instrument.

So, I can't express the importance enough of finding a luthier or tech that you can talk to, develop a relationship with, and keep bringing stuff to.  It is so very, very important.

That said, there are a few things that you can do to setup yourself or at least evaluate the setup of your instrument:
  1. First and foremost, if you don't know what strings are on it or when they were last replaced, get new ones.  If you don't know how to restring a guitar, have a luthier do it (it's not that expensive).
  2. Oil the tuners.  I like sewing machine oil, but it can be messy.  I do this at least once a season on my instruments.
  3. Polish it up, make it shiny.  Grime and gunk not only looks bad, but can potentially harm the longevity of the guitar.  Every restring should get a polished fretboard to boot.  Keep a microfiber cloth in your case or music bag and wipe it down quickly after you are done playing.
  4. Check the frets.  Sometimes they come loose or pop out a bit.  Do this by playing each string at each fret all the way up and down the neck.  Fixing this is usually a luthier duty, but you can at least find the fret and narrow his search.
In the long run, having a qualified repair tech evaluate the instrument is the most important part of getting to know your new guitar.

~DB

    Tuesday, August 9, 2011

    Laminate Vs. Solid Woods

    This may be an article better suited for my woodworking blog or a luthier blog... I've read, heard, and weighed in myself on several discussions of what is better: Laminate or Solid Woods for building guitars/ukuleles.  Well, I recently got the chance to make a great comparison between the two.

    My friends at Guitar Syndicate have on their shelf right now a Lanikai solid Koa and a Lanikai laminate Koa ukulele.  Both are concert sized and are spitting images of each other.  They both were strung at the factory/distributor with Aquila strings.  They are pretty much as close as you can get on comparing the two types of wood without actually going out and building two right next to each other.

    There are a few small cosmetic differences.  Finish seems to be the most difference.  Both are matte finish, but you can tell that a little more care was taken with the solid compared to the laminate.  The laminate being just a little lighter brown color.  Bindings and details are approximately the same.  It is also obvious that the solid wood uke is of a slightly higher quality craftsmanship.  Still, very close.

    Sound

    The real deal that everyone tends to talk about is the sound.  Well, between the two I can honestly say there is a difference (this is contrary to my previous opinion).  The solid seems to have a deeper tone to it compared to the laminate.  There is a surprising amount of contrast between the two on this.  Both sound great. The solid top seems to have a richer tone compared to the laminate.  I would say, though, that the difference is not enough for me to notice if I wasn't really looking.

    Both have a great, rich tone to them.  When I compare them to another uke on the wall, a Lanikai with a glossy black finish, there is tons of difference between the two.  The koa seems to have a much more woody flavor to its tone where the glossy black one seems a bit more plucky.  I've noticed that before comparing glossy finishes to just bare wood finishes.

    Other Concerns

    Arguably, I know a lot about wood (there's a she-said joke there somewhere).  Wood is the only material I know of that will never stop moving.  Tables that are still around from the ancient Egyptians have to be kept in a climate controlled case to keep them from warping so much that they literally fall apart.  It is a combination of temperature, air pressure, and humidity along ever cubic millimeter of the wood along with outside forces such as other pieces of wood and attached components that make wood move (or not move) one way or the other.

    When a luthier (or even a cabinet maker) selects wood for a project, the look very hard a the grain and moisture content to select not a piece of wood that won't move, but one that will move predictably.  That way, they can use that natural movement to strengthen the piece and make it last longer.

    When we talk about laminates in the music/luthier world, we are not talking about the same materials you buy at Lowes like plywood or laminate flooring.  Those materials are made at a far lower grade of uniformity and quality than luthier grade laminate woods are .

    Luthier grade laminate use much thinner, higher quality veneers to create the woods of a certain thickness.  Generally, you will see things like spruce or mahogany laminates witch are top layers of spruce/mahogany backed by other hardwoods.  When the pieces of wood are laid together, they are crisscross the grain and use very specific formulations of glue.  What results is a piece of wood that resists movement.  Since the vibrations that create the sound have to travel through several different medium, this dampens the tone somewhat, but is a lot cheaper than a solid piece of tone wood.

    Final Thought

    So, it's a trade off of sorts.  Laminates are much more stable than solid woods, but you have a slightly different tone.  Here in the mid-west where temperatures can be 107 in the summer and minus 20 in the winter plus you get large changes in humidity, I almost always choose laminates over solid woods.  But, if I was living in an area where the temperature, humidity, and pressure where a bit more stable I would definitely be buying all solid wood instruments.

    Hope this helps you make your decisions in the future.

    ~DB