Monday, November 7, 2011

Music Lesson 3A: Basics of Standard Notaion

Now that we have delved into a bit of the layout of the chromatic and the major scale, it is time for us to look at how musicians look at music:  Standard Notation.

There is a lot of argument amongst musicians on whether reading Standard Notation is a necessary skill for guitarists (or ukulele players).  There are a lot of valid points on both sides of the line, but there is one major reason why I encourage it:  Because it is the standard way that music is presented.  Countless volumes of sheet music are accessible to you as a guitar or ukulele player if you can only learn enough to see it.


The Staff

The Staff is where it all happens.  On the page of music, it is basically the lines where the music is written.  By itself, we should think of it as simply a time line where everything will be written out from left to right in chronological order.


The Staff consists of five horizontal lines running parallel to each other.  Notes are represented as either on a line or in a space.  The lower the tone of the note, the lower its position on the staff; the higher the note, the higher it's position.  If a note is higher (or lower) than the highest of the five lines of the staff, we add a small line above (or below for low notes) to make room for the note.


The Clefs


There are two basic clefs in music*: The Treble Clef and the Bass Clef.  For guitars and ukuleles, we usually will be using the Treble Clef, but knowing the Bass clef can be useful.
right: Treble Clef, left: Bass Clef

Clefs are used to indicate where the notes are to be located on the staff.  Notice how one end of the Treble Clef seems to wrap around the second line from the bottom of the Staff.  This is the clef's way of telling us where the note "G" is.  Treble Clef is sometimes referred to as "G Clef".  The Bass Cleff tells us where the "F" note is in a similar way.  Look at the line (second from the top of the staff) with the two dots above and below it.  That is the position of the "F" note.

Here's where the notes go on the staff with the Bass and the Treble Clefs:


Sub-Conclusion

After writing out this post, I decided to break up Standard Notation into a few lessons.  There is just a lot to cover.  Still to come are descriptions of Key Signatures, Time Signatures, Repeats, and Time Values of notes.  See the next post for more on this subject.

~DB

* There are numerous others, but the treble and the bass clef are generally considered to be the most used and well know.

Tuesday, October 25, 2011

Loopers

Recently, I came across a good deal at my favorite guitar shop, Guitar Syndicate, on an accessory that I have been wanting for a long time:  A looper.

Definition:

Loopers are pedals that record you playing a track and play it back for you on either a loop or a single run through.  The one that I picked up was a used DigiTech JamMan, but you can also find ones by Boss, Line6, and most major brands of effects.

My Defense:

Now, those of you who know me know that I sway towards the acoustic and natural sound for my playing.  As a general rule, I don't like using pedals unless it is absolutely necessary.  In some cases, pedals take what might be a nice sound and make noise (but there are some awesome things pedals can do if you let them, I just don't spend the time or money on it).

That all being said, this is not what I would call an effects pedal by any means.  The sound you put into a looper is what comes out on the other side.

Use 1: Practicing

For practice, loopers are great for creating a backing track that you can hone your lead skills against.  For us rhythm players, it also gives us a chance to hear what our comping sounds like and evaluate how effective we are.  In addition, you can record an entire song you play through and listen back to how it sounds.

Use 2: Live Shows

Live, loopers can be a solo instrumentalists best friend.  A select few players out there have the chops (or even the ability to get the chops) to be able to simultaneously play both their rhythm and lead parts on the same guitar at the same time.  (We call these players gods and do our best not to be smited by them.)  However, for the rest of us, loopers can give us the opportunity to play leads and solos in a gig without needing to hire a backup band. 

This is because loopers have a handy feature of being able to record on the fly and play back instantly.  It takes practice to get good at it, but a well rehearsed player can do amazing things with these.  I've heard of one soloist laying in multiple layers of guitar to the tune "Hotel California" where by then end he has five different layers on the same loop going at the end of the song!

Now, you may think of the above as cheating, but believe me: I've seen it done and it in no way distracts from the show.  Good players are good players and this type of tool in their gig setup only promises an even better show for the audience.

Use 3: Composition

I don't do a lot of song writing (working on that one), but loopers can also help a lot with this.  What happens to me a lot is that I start playing or singing something that sounds awesome, then I have an instant memory wash where I can't remember it.  The JamMan that I picked up has a mic input which allows you to record your voice as well.  So, if I was recording when I played that little diddy I've worked on, I would be able to go back and add to it.  Not to mention, after I have chorded out I can go back and figure up melodies and bass lines later.

Conclusion

All in all, a looper can be a great tool for your set up.  They do require you have an amp and some way of getting the music into the looper (pickup on your instrument or a microphone), but aside from that small limitation, it can be your best friend.

Friday, October 21, 2011

Music Lesson 2: Tones, Semi-Tones, and the Major Scale

Now that we have a basic understanding of the Chromatic Scale, lets take a look at note relationships and the Major Scale.

Tones and Semi-Tones

As we move our way up the Chromatic Scale and back down we are moving in a specific order between the notes.  Now, every time you move from one note to another you are moving in what is called an Interval.  The term Interval is just a fancy name used to describe the relationship between two notes.  For this lesson, we are going to focus on two types of Intervals.

The most basic of these Intervals is called a Semi-Tone.  On our Chromatic Scale, we are moving one Semi-Tone at a time (or half step as we called it before) as we move up and down the scale.


Notice, as we discussed in the previous lesson, that as you move up or down the Chromatic Scale you are also moving one fret at a time (this applies to guitars, ukuleles, and any other fretted instruments* such as mandolin).


Now lets double the Semi-Tone.  When you add two halves, you get a whole, right?  (I hope you know this already...)  Well, when we do two half-steps, it becomes a whole step or one step. And when we do two Semi-Tones, we get a Tone.

As we move up or down the neck of our instrument(s), this means we are moving two frets each time.  So, let's try to move from C to C up the neck only in Tones.


Do you see what happened there?  In six steps we got to our next C.  Also, we ended up with a bunch of sharps (or flats depending on if you go up or down).  We haven't really discussed keys yet, but a general rule is that the key of C has no flats or sharps in it.  It's all natural!

The Major Scale

So, we need to make our way from C to C (up and then back again) while doing two things: not hitting any sharps or flats, and using each natural note in the scale.  When we do this, we get the following:


Now, let's compare this to the Chromatic Scale we learned in the previous lesson.


Notice how we skip all of the sharps/flats and move in a specific order.  Let's look at this in relation to Tones and Semi-Tones.


This formula of T, T, S, T, T, T, S is what we call the Major Scale Formula.  Moving in this manner is also called Diatonic.  For now, just think of Diatonic as meaning alphabetical.  Using this formula, you can now start on any note and find any scale!!!


Now, let's relate this to our fret boards.  Here is the C Major Scale on the ukulele and the guitar.


And here is the same scale with us jumping to different strings when we can.


One of the great things about fretted instruments is that you can move things around very easily from one note to another just by shifting to another fret.  With our Major Scale, we need only start at another spot and use the same pattern to generate new Major Scales.  In future lessons, I will show some of the many different scale patterns or fingerings that exist.  These will come in handy.  For now, try to find different ways of fingering different Major Scales up and down the neck.

Note:  For ukuleles, major scale patterns can be a little restrictive in regards to the different ways you can finger them.  This is because most ukuleles are tuned in reintrant tuning and your primary strings for the pattern will be limited to three strings (the C, E, and A strings).  If you are using linear tuning (also known as low G tuning), then it will be easier to come up with multiple Root to Root scale patterns since you now have four strings to work with.  I'll try to shed some light on this in the later lesson.

~DB


* Some exceptions of this include mountain dulcimer.  There are others in more exotic music styles that do not follow this rule.  However, in general, this is true for fretted instruments.

Tuesday, October 11, 2011

Music Lesson 1: Chormatic Scale

So, for lesson one I'm going to start out at the bottom of music theory: The Chromatic Scale.  This scale encompasses all the notes in one big shot, but at the same time illustrates a lot of the relationships between the notes.

It is important to understand that everything you learn in music builds off of what you learned before.  Sometimes things don't need a specific order, but most things do.  The further you get out of order, the harder a concept will be.

For this lesson, we are going to use the root and key of C.  Roots and keys will be described in much more detail in later lessons.  For now, just understand that the key of C is the easiest for us to work with.

The chromatic scale uses every note between the root note (in this case, C) and it's octave (or the next time that note comes up in the scale).  So if we start at C, we work this way:


C C#DD#EFF# GG#AA#BC


This pattern is constant regardless of what root note you start with.  As we move from one note to another, each move is down by a half step.  The half step is the shortest distance between two notes*.  As an additional example, here is the chromatic scale for the Key of E (wheel use it later on the guitar):


EFF# GG#AA#BC C#DD#E


As you can see, we are also only using sharps (#) as we go up the scale.  It is also acceptable to use flats (b) instead of sharps.  However, we typically use sharps when we ascend (go up) the scale and flats when we descend (go back down).  Here is the same scale (in C) going down with flats:


C BBbAAbGGb FEEbDDbC


As you may notice, where there was a C# going up, we now have a Db.  That's because the sharp (#) makes the indicated note a half step higher and the flat (b) makes it a half step lower.  Since D comes after C, a Db is the same as a C#.

There is another thing to take note of with this scale.  Notice how the scale moves between E and F and also B and C.  Normally, on the scale, if move from one note to another, you would use a sharp (going up) or a flat (coming down) to go that half step between.  Well, there is not half step between E and F or B and C.

So, here is what you need to remember about this lesson:
  • Chromatic scales move one half step at a time from root to root (an octave).
  • When we move up, we sharpen the pitch so we use sharps (#).
  • When we move down, we flatten the pitch so we uses flats (b).
  • A Bb and an A# are the same pitch (as are other flat/sharp neighbors).

The practical side


Now we need to take this knowledge to the fretboard.  For ukuleles, we will use the C chromatic scale, for guitars we will use the E chromatic scale.

Notice as you work your way up and down the fretboard chromatically, you are also only moving one fret at a time.  This is because on fretted instruments (this includes the guitar) each fret represents one half step.

Now lets look at switching to a different strings instead of staying on one.


This is a good illustration of how tuning your ukulele or guitar to itself works.  As you can see, the notes blend themselves into the next string.

Finally, here are both fretboards laid out up to the twelfth fret with all of the notes.  Try to start at one note and work your way up and down the fretboard doing a full chromatic scale.

Now that you have a good understanding of the chromatic scale, we will move on to the next part of music which is tones and semitones.  We'll use this scale to do so, so make sure you know how it works before moving on.

~DB

* When I talk about music, I talk about western music (as opposed to Eastern or African or Tribal music).  In this case, there are some instances in other forms of music that use steps that we would call quarter or even smaller.  But for our purposes, we assume that a half step is the smallest.

Guitar and Ukulele Tuning

Tuning your instrument is one of the first skills you should master when learning how to play.  If you are lucky, you'll pick an instrument like piano that has to be tuned by a professional and therefore gets you off the hook of learning.  But, you probably aren't that lucky since you are here to learn.

I'm putting guitar and ukulele in the same lesson for one simple reason:  They share a lot in how you tune.  I say that for those who start on one instrument and then move to the other.  Many a guitarist has picked up a ukulele, felt completely baffled, and put it back down usually muttering some immature notion such as "those are cute toys."  (If you say that, I will unfriend you.)

Lets start with guitar.  Standard guitar tuning is E A D G B E (from low to high).  You can use an acronym to  remember the tuning if you would like.  I like the one "Elephants And Donkeys Grow Big Ears".  Now, for tuning, we always want to start at the lowest note (fattest string) and work our way up. (This is because the bass supports the rest of the music.)  See below for more info on how to get that first note tuned.

Now, once you have that first note tuned, you can use the guitar to tune itself.  This is a very useful method for not only quick tuning between songs, but also for developing you ear to hear different tones.  First, count up five frets from the nut on the low E string and strum that note. This will be the note A that you should tune the next string to.  You can count up this way to get the notes for the next few strings too.  But, once you get to tuning the B string, you need to count up only four (not five) to do this.  For the last string, count up five from the not on B string.  Here's a diagram:


Ukulele

Ukulele is only a little different.  We can still use the same idea to tune it to itself, we are just going to use different pitches.  Now, at this point, it is important to point out something that usually throws a few people off.  The ukulele has several different options when tuning.  The standard tuning is what we call C6 tuning.  However, even the standard has two flavors: linear and re-entrant.

Linear tuning means that we tune all of the strings in order from low to high.

Re-entrant tuning means that we start with a higher string, then go down to a lower string and proceed up the scale. Five string banjo also uses this type of tuning.  This tuning also gives ukuleles the characteristic "My Dog Has Fleas" sound.

Whether lenear or Re-entrant, the order of notes is the same in C6 tuning (which we will refer to as standard tuning).  The notes are G C E A.  The G string is the one which we either tune low (linear) or high (re-entrant).

Since re-entrant is the most common tuning, I will show you how to do "self-tuning" in that style.  First, we want to tune our lowest string which will be not the G, but the C string (again, see below for tips on getting that note tuned).  Then, we count up 4 frets to get the note for the next string which is E.

Now we will regress to tuning the G string (which we skipped).  Count up 3 frets from the nut on the E string will give us the G we are looking for.  Once you have that in tune, count up the E string two more (a total of 5 from the nut) and you have your A for the A string.

Here is a diagram:

Tuners

Seventy years ago, there weren't many options for tuning an instrument. You usually found a piano or other instrument that you could tune to.  If you were the typical upper middle class home, you'd just use the piano.  If you were in poverty, you did your best to tune it by ear.  Now-a-days, though, there are tons of options for tuning your instrument.
A Guitar Pitch Pipe

The first is still old school, but I highly recommend it for reasons of training your ears.  A pitch pipe as they are called can be bought for whatever instrument you are tuning or even a chromatic one with several pitches.  You simply blow on the desired pitch and tune the instrument by ear.  Most came with multiple pitches so you didn't have to tune the instrument against itself.  Aside from needing to tune by ear, the downside is that if the pitch pipe was out of tune, your instrument was out of tune.

There are also several websites that have "online" pitch pipes.  This can be a good option if you have speakers and often play in front of your monitor.
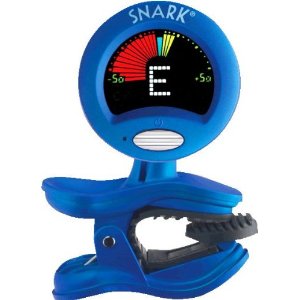
Snark Clip On Tuner
In our electronic age, the best method is the electronic tuner.  Twenty years ago, electronic tuners were still in their adolescence and relied on a poorly constructed microphones to pick up the sound your instrument made.  They progressed to plug in ones for electrified instruments, but those got expensive quick.  As digital electronics got better and better, the clip on tuners have hit the scene and changed the way we tune.

Clip on tuners can run from $10 up to $250 depending on who made them and if the come with any other functions or extras.  My experience is that a $20 or $30 tuner will last a lifetime if not abused and get you as in tune as you need. 

However, if you play an electrified instrument two options outside of the clip on are a tuner that you can plug in to the output cable or an on-board tuner.  The "in-line" tuners are great if you are already using effects petals.  It makes tuning pretty simple and can even help by "turning off" your instrument.  The on-board tuners are tuners added directly to your instruments on-board electronics.  They aren't available to every instrument, but are a wise upgrade if you are buying a new instrument from the factory.

So, that's all I have to say on tuning in this lesson.  As I mentioned before, mastering tuning is a critical step to mastering any instrument.  I highly recommend you learn not only how to use electronic gadgets, but also how to tune by ear.  The better you can recognize that you are in tune by ear, the easier it will be to know you are out of tune.

Monday, October 3, 2011

Banjolele Blues

I've been having some string trouble with my Goldtone Banjolele lately and I finally figured out what was wrong.  Let me give you a little background...

First off, ukulele strings do not come with the convenient little nubs, rings, beads, loops, etc at the end to make it easy to string.  They, like classical nylon guitar strings, are just strings at both ends.  This means that you usually have to tie the strings to the bridge or tailpiece and tie in such a way that the knots don't slip or break the string.  At first, I thought there was a disadvantage to my banjolele because I couldn't get the knots just right.

In fact, since I have owned the banjo (bought in April) I have gone through five sets of strings.  No, I don't play it that often.  What has been happening is I would open the case or come in the room after leaving it on a stand overnight and find one (or more) of the strings had popped at the knot.  Usually it would be the metal wound strings (I have a baritone with the wound D and G).  In fact, during a rehearsal for the musical "Flyer" that I was in this summer, a string popped and I found myself frantically retying it before the next piece started.

So, I got to the research.  There had to be a better way of tying these or something I was missing.  What I found made me a little excited.

The Goldtone banjoleles use a tailpiece that is not supposed to be tied.  That's right, it is what is known as a "no knot" tailpiece.  From what I can gather, this was a common tailpiece on '20s and '30s style banjos (especially Gibsons).


There is one small problem that I still have, though.  Elderly sent me the banjo with the strings knotted onto the tailpiece.  I'm assuming that this is a common thing for them.  There must have been some set up after Goldtone sent it to them, but either the manufacturer or Elderly installed the strings wrong.  Well, after trying to correct the mistake I can see why it was done.

(Now, let me pull back a second and say I like Elderly and Goldtone.  I will still be an Elderly customer and I would buy another Goldtone banjo/banjolele/guitar if I was shopping.)

The Goldtone version of the "no-knot" tailpiece has a big flaw:  The pegs are not far enough apart for the strings to fit in between them (see the pic above).  The good news: a replacement part is cheap.  Stewmac has them for about $10.  The downside is: they aren't in stock!

Luckily, my old friend ebay still likes to throw me a bone or two.  The new tailpiece not only allows me to properly install the strings, but it also allows me to adjust the tail piece's screw a little more accurately (I hear the closer it is to the head, the brighter the sound).

So, if you happen to purchase a Goldtone banjolele, take a look at that tailpiece.  If you are having trouble with strings snapping, a replacement may be the answer.

~DB

Tuesday, September 27, 2011

Collectors

A few days ago before a lesson I was standing at the uke wall in Guitar Syndicate plucking away and tuning up the ukes like I tend to do.  Eventually, and older fella walked over and commented that he had about that many ukes at home himself.

"Oh," I said, "Have you even considered joining our ukulele club?"

"No, I don't really play them that much," he retorted.

Since I was a lot younger I've noticed that there are tons of instruments wasting away in collections all over the world.  Now, museum pieces and items beyond repair aside, I have always felt a little guilty about this.  Instruments have a purpose, and that is to make music.  So many of these instruments haven't seen the light of day or felt the touch of a musicians capable hands because they are in such collections.

I'm not exempt from this crime.  I have at a small collection of wind instruments that get brought out on rare occasions that I just don't seem to be able to part with.  Sentimental as my feelings are (one is my trombone that was my best friend in high school, and the other is my dad's coronet he played in high school), it would be nice if they got played once in a while.

So it is that I find myself talking more frequently to collectors as I spend more time at the local shop.  They always have a story on the guitar they let go, and can play a few Eagles or Hendrix licks better than even the most astute starving artist.  And they keep the guitar shops and manufacturers in business.

That's right, we the penniless musicians owe them a lot.  For every rare archtop or Les Paul they keep out of our hands they encourage a hundred more inexpensive models to be produced, bought, sold, and re-sold used to slip into the market.  If not for them, we would not have such wonderful guitar lines such as the Ibanez Artcores or countless Strat and Tele copies.

So, I keep talking to them.  I pick their brain as they tend to also be the heralds of much guitar (and ukulele) history.  And, occasionally, I work on that invite back to their museum/garage where their little studio is full of 30 guitars and 12 ukuleles.

~DB

Saturday, September 10, 2011

UnPause

Thanks for your patience with me.  I lost my job recently and now I'm finally back on my feet enough that I feel I can post more here.  In the in-between I've learned a thing or two on western swing guitar and I'll be sharing that as well.

~DB

Tuesday, August 23, 2011

Pause

I'm taking a week pause.  I've had some serious life issues crop up that need dealt with.  I'll be back to a weekly next week.

Wednesday, August 17, 2011

Matt Warnock

Recently, I've been following along with Matt Warnock's "Play Better Jazz in 30 Days Series" via the forum at jazzguitar.be.  I highly recommend anyone who wants to play better jazz guitar to check them out.  Even if you are just a general guitar player and want to see what jazz guitar can be about, this is a good series for that.

~DB

Tuesday, August 16, 2011

Setting Up

One of the hardest things to get into my head for the first few years of playing was the importance of correct setup of my guitar.  I figured, like most people, that guitars came like most anything else: ready to go.  Unfortunately, that can't be further from the truth.  Guitars, bass guitars, ukuleles, and most instruments need a qualified luthier or technician to do some adjustments to the instrument to make it ready to play.

Most manufacturers will do there best to make them playable out of the box.  But, when you ship an instrument and bump it around a bit, the parts are going to get a little squirrely.  Even more, weather and climate changes can literally change the shape of an instrument.

So, I can't express the importance enough of finding a luthier or tech that you can talk to, develop a relationship with, and keep bringing stuff to.  It is so very, very important.

That said, there are a few things that you can do to setup yourself or at least evaluate the setup of your instrument:
  1. First and foremost, if you don't know what strings are on it or when they were last replaced, get new ones.  If you don't know how to restring a guitar, have a luthier do it (it's not that expensive).
  2. Oil the tuners.  I like sewing machine oil, but it can be messy.  I do this at least once a season on my instruments.
  3. Polish it up, make it shiny.  Grime and gunk not only looks bad, but can potentially harm the longevity of the guitar.  Every restring should get a polished fretboard to boot.  Keep a microfiber cloth in your case or music bag and wipe it down quickly after you are done playing.
  4. Check the frets.  Sometimes they come loose or pop out a bit.  Do this by playing each string at each fret all the way up and down the neck.  Fixing this is usually a luthier duty, but you can at least find the fret and narrow his search.
In the long run, having a qualified repair tech evaluate the instrument is the most important part of getting to know your new guitar.

~DB

    Thursday, August 11, 2011

    Good Reminder

    A few nights ago I got together with a group of friends that I get to jam with a lot.  They primarily play bluegrass music (with a little folk rock here and there) and drink beer.  So, as you can imagine, we have a lot of fun.

    It had been a while since I had gone out to play in a setting like this and it really made me feel good about my skills and how they have progressed.  It is always a huge ego boost when you run through a song or two and are not only adding nice rhythms but also lics in the right play along with nice solo lines.

    If you haven't already, find a group of people to jam with.  This should be not a "band" per-say, but more of a group of people who just want to jam.  It's best if there are only about five to ten folks wanting to play and that you have an audience of about the same size.  Just playing in groups like this is a huge boost to not only your ego but also your skills.  You'll figure out real quick what you need to practice on.

    ~DB

    Tuesday, August 9, 2011

    Laminate Vs. Solid Woods

    This may be an article better suited for my woodworking blog or a luthier blog... I've read, heard, and weighed in myself on several discussions of what is better: Laminate or Solid Woods for building guitars/ukuleles.  Well, I recently got the chance to make a great comparison between the two.

    My friends at Guitar Syndicate have on their shelf right now a Lanikai solid Koa and a Lanikai laminate Koa ukulele.  Both are concert sized and are spitting images of each other.  They both were strung at the factory/distributor with Aquila strings.  They are pretty much as close as you can get on comparing the two types of wood without actually going out and building two right next to each other.

    There are a few small cosmetic differences.  Finish seems to be the most difference.  Both are matte finish, but you can tell that a little more care was taken with the solid compared to the laminate.  The laminate being just a little lighter brown color.  Bindings and details are approximately the same.  It is also obvious that the solid wood uke is of a slightly higher quality craftsmanship.  Still, very close.

    Sound

    The real deal that everyone tends to talk about is the sound.  Well, between the two I can honestly say there is a difference (this is contrary to my previous opinion).  The solid seems to have a deeper tone to it compared to the laminate.  There is a surprising amount of contrast between the two on this.  Both sound great. The solid top seems to have a richer tone compared to the laminate.  I would say, though, that the difference is not enough for me to notice if I wasn't really looking.

    Both have a great, rich tone to them.  When I compare them to another uke on the wall, a Lanikai with a glossy black finish, there is tons of difference between the two.  The koa seems to have a much more woody flavor to its tone where the glossy black one seems a bit more plucky.  I've noticed that before comparing glossy finishes to just bare wood finishes.

    Other Concerns

    Arguably, I know a lot about wood (there's a she-said joke there somewhere).  Wood is the only material I know of that will never stop moving.  Tables that are still around from the ancient Egyptians have to be kept in a climate controlled case to keep them from warping so much that they literally fall apart.  It is a combination of temperature, air pressure, and humidity along ever cubic millimeter of the wood along with outside forces such as other pieces of wood and attached components that make wood move (or not move) one way or the other.

    When a luthier (or even a cabinet maker) selects wood for a project, the look very hard a the grain and moisture content to select not a piece of wood that won't move, but one that will move predictably.  That way, they can use that natural movement to strengthen the piece and make it last longer.

    When we talk about laminates in the music/luthier world, we are not talking about the same materials you buy at Lowes like plywood or laminate flooring.  Those materials are made at a far lower grade of uniformity and quality than luthier grade laminate woods are .

    Luthier grade laminate use much thinner, higher quality veneers to create the woods of a certain thickness.  Generally, you will see things like spruce or mahogany laminates witch are top layers of spruce/mahogany backed by other hardwoods.  When the pieces of wood are laid together, they are crisscross the grain and use very specific formulations of glue.  What results is a piece of wood that resists movement.  Since the vibrations that create the sound have to travel through several different medium, this dampens the tone somewhat, but is a lot cheaper than a solid piece of tone wood.

    Final Thought

    So, it's a trade off of sorts.  Laminates are much more stable than solid woods, but you have a slightly different tone.  Here in the mid-west where temperatures can be 107 in the summer and minus 20 in the winter plus you get large changes in humidity, I almost always choose laminates over solid woods.  But, if I was living in an area where the temperature, humidity, and pressure where a bit more stable I would definitely be buying all solid wood instruments.

    Hope this helps you make your decisions in the future.

    ~DB

    Wednesday, July 20, 2011

    Post Number One: Feet First

    I've long been a blogger.  I didn't see much sense in it at first when my professors in college required me to post a blog for peer review on economics.  It wasn't until later that I realized the vast potential of blogs.

    Blogs can be used to enlighten, teach, and share.  That is my goal here.  I want to share with you everything that I know about playing my two favorite instruments: Guitar and Ukulele.  True, there are several thousand resources out there for learning this stuff.  Much of it in the same fashion as what I'm going to do.  But, I'll do it again anyway.  Not to reinvent the wheel, but to give you another viewpoint and a place to start and walk through from day one.

    My plan is simple:  I'm going to start at the most basic idea of explaining the guitar and the ukulele and their various parts and what those parts do.  Then, we'll get the basics of holding, tuning, and some care.  After that, I'll build you up a solid foundation in music that will be directly applicable to playing and enjoying these two instruments.  Sprinkled in I will talk about style, buying decisions, finding lessons with an instructor/tutor, finding places to play, and finding ways to take your music further.

    Got questions, I'll do my best to help you find the answers.

    I hope you enjoy it as we go along!

    ~Danny