Showing posts with label lesson. Show all posts

Monday, November 11, 2013

Swing Guitar - Part Nine


The Soloing primer

As an additional appendix to the swing guitar workshop, I wanted to provide students with the bare bones approach to soloing so they would have a jumping off point.  That being said, the truth is sort of grim:  There is no easy method to soloing.  Every method I have ever seen or studied takes time and effort to master.  That said, when I got started in soloing (which wasn't long ago) I found a few things pushed me ahead further than others.  Here are a few of those techniques.

First and foremost, I can't recommend enough that you learn the melody (also referred to as the head) to any song you are soloing over.  The melody is full of every element that will make a solo sound good and should NOT be overlooked as a starting place.  In fact, in many styles of music (i.e.: bluegrass, swing) playing the "head" of the song perfectly is considered to be the best solo you could possibly do.

In order to get the dexterity up and muscle memory to really make learning melodies easy and then creating solos, the best place I know to start is the major scale and its modes.  Now, I'm not going to advocate that you spend hours and hours trying to remember and play each of the modes by name.  However, I do advocate learning to see the major scale in five positions on the neck.  This is how I approach it and it has done me a ton of good.


Basically, we are playing the major scale and extending it across the finger board both up and down as far as we can while staying within a given position.  Each of the positions is named for the degree of the scale which they start on.  So, for shape 5, we start on G since G is the 5th degree of the C major scale.

After you have mastered the five positions, a good next step is to work through arpeggios within those shapes.  Arpeggios are another lesson altogether so we won't get too much into it here.  But, they are incredibly useful as a soloing tool since they will basically outline the chord changes in a tune as you play!

But don't stop there!  As you go, you should look for other scales to build solos from as well.  Scales like minor and major pentatonics, harmonic minors, whole tones, and blues scales just to name a few.  With each new scale, try to play solos using only those scales and really work it up in the woodshed.

Another key part of soloing is building speed.  The best way I know to do this is to go slow and use a metronome.  Remember that guitar playing is just like any other physical activity in that we have to build up muscle memory in order to sort of automate ourselves.  By practicing things slowly and accurately, you will build up that muscle memory so that when you speed things up, you will be more accurate and sound better.

Lastly, just a couple of notes on practicing.  We live in a very fortunate age as musicians because we have access to some awesome practice tools that our predecessors didn't.  Namely, computers and all the great things they do.  I use an iPad when I practice and it has helped a lot.  That said, you don't necessarily need one.  But, assuming you have computer access since you are reading this, I would say you need to have the following:

- Tuner
   * Either a clip on or something on your computer/iPad/iPhone
- Metronome
   * I use one on my iPhone/iPad
   * Small units can be gotten fro $20 at most music shops
   * There are numerous free online metronomes
- Recording software
   * I use Soundcloud and DAW
   * You could also use a digital recorder or a micro cassette recorder
- Backing track software
   * I use iReal Pro and it is amazing for the price.
   * There is also Band in a Box, but it is pricier.
   * I have also found one or two free online backing track makers that are useful.

The biggest need on that list (outside of a tuner of course) is something that you can use as a play along.  Whether you are typing in chord changes that the computer plays back (iReal Pro, Band in a Box, etc) or recording yourself using a digital recorder (or Soundcloud, DAW, etc), having some way to play over changes (chord progressions) is a must.  Once you get a certain shape or scale memorized enough that you can play it fairly regularly, then start trying to play that scale up against a play along backing track.  This way, you can start to hear how the notes line up with the chords.

~Danny

Monday, November 4, 2013

Swing Guitar - Part Eight

My eighth installment of Beginning Swing Guitar is going to be a bit of a review and give you some good reference material to get you moving forward with chords.

So far, we have taken most of our chords from two basic families.  Knowing these two families intimately will be invaluable to you over time and make chord building very easy to do on the fly.

Before we get too far along, take a look at this reference chart.


I've blocked out the regular dominate 7 chords in solid dots and left some relevant intervals (such as b3 or b5) to give you some reference.  You can use this chart to quickly learn and find different qualities of chords.  Use it as a reference at first and then start trying to remember the chords.

Building Extensions

To build extended chords we need to understand what we are meaning by that.  Basically, an extended chord is one beyond a simple 7th chord.  You may have seen these are 9ths, 11ths, or 13ths.  To create one of those chords, we need to understand what the 9th, 11th, and 13th interval is.  Basically, just keep counting.
 
CDEFGABCDEFGABC
123456789101112131415

So, if we wanted to add a 9 to a chord to get a nice swingy sound, we would simply find the 9th degree of the scale and put that in the chord.  Since the 9 is the same as the two, we will often replace the root chord with a 9 by going up from the root two frets.  We used that in the previous lesson where a 5-4-3-2 shape with the 3rd in the base became a 9 chord.

Try playing around with the chord shapes, their qualities, and some extensions and putting them into your rhythm playing.

Monday, October 14, 2013

Swing Guitar: Part Six

Simple Moving Bass Notes

Six Foot One is a good example of a tune that we can use the simple concept of alternating bass notes.  As in many forms of music, bass lines can be very simple in Swing (they can also be very complicated walking bass styles). 

Alternating bass usually refers to alternating between the root (or tonic) note of a chord and the fifth as the bass of the chord.  To create the alternating bass style we are going to use a couple of chord shapes that we have already seen together.


If you don't remember the chords to Six Foot One, here is a refresher.


Now, let's look at how we alternate those bass lines.


And the video...


Notice how the alternating bass line moves the rhythm of the song.  This is really useful technique for adding that sort of moving or driving sound to your playing.

A word of caution, though...  When playing with a bass player, this sort of movement can really get in the way of the overall sound.  It's important to let the bass player be a bass player.  Just like it is important for them to let you be a guitar player!

That said, in ensembles where there is not a bass player, and especially when you are playing solo or accompanying a soloist, this method is really useful.  Just to play around with it, try not using a pick and just using your fingers!!!

~Danny

Monday, October 7, 2013

Swing Guitar: Part Five

This is part five of my Swing Guitar Workshop which I will be teaching at the Folk Alliance Winter Music Camp this coming February.  Make sure to visit their website and get signed up for the camp.  There will be tons of great classes from local and national musicians on all types of music.

Six Foot One, Tons of Fun

Again, we need to change names around.  I'm betting you know the tune. It's FIVE times as fun as a FOOTball game played by TWO leprechauns.

Hehe...

This tune makes a great teaching platform from the Circle of Fifths because it basically follows the circle in a dominant cycle.  Plus, after we learn the regular tune, we will come back to this and look at it with some fun bass note stuff in another lesson.

made with iRealb

 Just in case you didn't know, the symbol "N.C." in the last two measures of the B section mean "No Chord".  Basically, after you play the G7, there is a break there.  When I play solo, sometimes I will mute all the strings and strum (or scratch as I call it) to the bit to keep time.

Take a look at this handout I'm using for the class for an explanation of the chord shapes that I will be using.


Now, here is the example via SoundCloud:


Take a look at this and play around with it. We will get some variations into the tune in a future lesson.  In the mean time, if you have any questions, feel free to ask!

~Danny

Monday, September 30, 2013

Swing Guitar: Part Four

This is the fourth installment of my series on Swing Guitar comping.  As I've mentioned before, this is my prep work for an upcoming workshop that I will be teaching for the Folk Alliance's winter conference.  Check them out for more information. I hope to see you there!

This lesson will focus on a tool that musicians of every level and genre use: The Circle of Fifths.

I talked a little in previous lessons about how this was used in terms of dominant cycles.  This will be just a brief explanation of how to use the Circle of Fifths as a comping tool and as a reference tool.  There are so many different uses of the Circle that I won't be able to cover all of them here, but I do hope to give you a good working explanation as well as how to use it in Swing Guitar.

What's a Fifth

When we say a fifth, we are talking about an interval between two notes.  In this case, a root (or tonic) note and the fifth degree (or note) on a scale.

To find that fifth, we count the root as one and work our way up the scale.  In the key of C, the fifth note is G.  To build our circle, we keep doing this until we come back to C natural.  In all, there are twelve notes (just like there are twelve positions on a clock; weird!).


The Circle


As a cool little mathematical (read: magic) result, by moving through the twelve notes around in fifths, when we reverse it, we are working in fourths!  Notice that "F" is the fourth degree of the C major scale.

Minor chords

As a reference, many people who use the Circle tend to group the relative minors of each key/chord with the majors already listed.  To find a relative minor, we simply count up six notes on the major scale.  Notice that would be "A" on the C major scale so we use Am.

Below is the circle with the relative minors written in for you.


Dominant Cycle Exercises


Learning to use the Circle as a practice tool can making learning new chords shapes, progressions, scales, arpeggios, licks, or any other melodic or rhythmic device a lot more fun.   Here are some ideas on how to use dominant cycles for practice:

Scales
- Choose a scale such as a mode of the major scale
- Use one fingering to play the scale in C
- Move a fifth to play the scale in G
- Keep moving in fifths around the circle
- Do the same as above moving in fourths

Chord Progressions
- Pick a progression in C keeping chords within two or three frets
- Move a fifth to G and play it again
- Keep moving until you have gone around the circle
- Do this again moving in fourths

Chord Shapes
- Pick a chord shape you are trying to master
- Play the C version of the shape
- Move a fifth to G and play it again
- Keep moving until you have gone around the circle
- Do this again moving in fourths

Again, working in dominant cycles in a great way to learn the relationships of different chords and notes.  And by playing though exercises using the circle, you will inevitably learn the fretboard as well.

Backcycling

Last but not least, I wanted to share something that makes the circle really useful in jazz.  Backcycling is  method of following the chords of a particular key backwards.  Let's look at the C major scale notes again and then harmonize them.

C - D - E - F - G - A - B

Now Harmonized (make them chords)
Cmaj7 - Dm7 - Em7 - Fmaj7 - G7 - Am7 - Bm7b5

Now, let's put them in order with the circle.  Note that the if we look at C and move around the circle in fifths until we run out of notes on the C major scale, we end with B.  So, that is where we will start.

Bm7b5 - Em7 - Am7 - Dm7 - G7 - Cmaj7 - Fmaj7

Now let's look at the numbers for those chords:

vii - iii - vi - ii - V - I - IV

Here is a look at it with all that on the circle.


Notice the ii - V - I in there???  In fact, some tunes you will see this cycle work through from start to finish!  This means that if you can master this harmonization of the circle in all keys you have the bare bones to learn a lot of the jazz and swing repertoire that is out there!

Take a look at all this and have fun with it.  If you have any questions, feel free to post them and I'll do my best to help explain!

~Danny

Monday, November 7, 2011

Music Lesson 3A: Basics of Standard Notaion

Now that we have delved into a bit of the layout of the chromatic and the major scale, it is time for us to look at how musicians look at music:  Standard Notation.

There is a lot of argument amongst musicians on whether reading Standard Notation is a necessary skill for guitarists (or ukulele players).  There are a lot of valid points on both sides of the line, but there is one major reason why I encourage it:  Because it is the standard way that music is presented.  Countless volumes of sheet music are accessible to you as a guitar or ukulele player if you can only learn enough to see it.


The Staff

The Staff is where it all happens.  On the page of music, it is basically the lines where the music is written.  By itself, we should think of it as simply a time line where everything will be written out from left to right in chronological order.


The Staff consists of five horizontal lines running parallel to each other.  Notes are represented as either on a line or in a space.  The lower the tone of the note, the lower its position on the staff; the higher the note, the higher it's position.  If a note is higher (or lower) than the highest of the five lines of the staff, we add a small line above (or below for low notes) to make room for the note.


The Clefs


There are two basic clefs in music*: The Treble Clef and the Bass Clef.  For guitars and ukuleles, we usually will be using the Treble Clef, but knowing the Bass clef can be useful.
right: Treble Clef, left: Bass Clef

Clefs are used to indicate where the notes are to be located on the staff.  Notice how one end of the Treble Clef seems to wrap around the second line from the bottom of the Staff.  This is the clef's way of telling us where the note "G" is.  Treble Clef is sometimes referred to as "G Clef".  The Bass Cleff tells us where the "F" note is in a similar way.  Look at the line (second from the top of the staff) with the two dots above and below it.  That is the position of the "F" note.

Here's where the notes go on the staff with the Bass and the Treble Clefs:


Sub-Conclusion

After writing out this post, I decided to break up Standard Notation into a few lessons.  There is just a lot to cover.  Still to come are descriptions of Key Signatures, Time Signatures, Repeats, and Time Values of notes.  See the next post for more on this subject.

~DB

* There are numerous others, but the treble and the bass clef are generally considered to be the most used and well know.

Friday, October 21, 2011

Music Lesson 2: Tones, Semi-Tones, and the Major Scale

Now that we have a basic understanding of the Chromatic Scale, lets take a look at note relationships and the Major Scale.

Tones and Semi-Tones

As we move our way up the Chromatic Scale and back down we are moving in a specific order between the notes.  Now, every time you move from one note to another you are moving in what is called an Interval.  The term Interval is just a fancy name used to describe the relationship between two notes.  For this lesson, we are going to focus on two types of Intervals.

The most basic of these Intervals is called a Semi-Tone.  On our Chromatic Scale, we are moving one Semi-Tone at a time (or half step as we called it before) as we move up and down the scale.


Notice, as we discussed in the previous lesson, that as you move up or down the Chromatic Scale you are also moving one fret at a time (this applies to guitars, ukuleles, and any other fretted instruments* such as mandolin).


Now lets double the Semi-Tone.  When you add two halves, you get a whole, right?  (I hope you know this already...)  Well, when we do two half-steps, it becomes a whole step or one step. And when we do two Semi-Tones, we get a Tone.

As we move up or down the neck of our instrument(s), this means we are moving two frets each time.  So, let's try to move from C to C up the neck only in Tones.


Do you see what happened there?  In six steps we got to our next C.  Also, we ended up with a bunch of sharps (or flats depending on if you go up or down).  We haven't really discussed keys yet, but a general rule is that the key of C has no flats or sharps in it.  It's all natural!

The Major Scale

So, we need to make our way from C to C (up and then back again) while doing two things: not hitting any sharps or flats, and using each natural note in the scale.  When we do this, we get the following:


Now, let's compare this to the Chromatic Scale we learned in the previous lesson.


Notice how we skip all of the sharps/flats and move in a specific order.  Let's look at this in relation to Tones and Semi-Tones.


This formula of T, T, S, T, T, T, S is what we call the Major Scale Formula.  Moving in this manner is also called Diatonic.  For now, just think of Diatonic as meaning alphabetical.  Using this formula, you can now start on any note and find any scale!!!


Now, let's relate this to our fret boards.  Here is the C Major Scale on the ukulele and the guitar.


And here is the same scale with us jumping to different strings when we can.


One of the great things about fretted instruments is that you can move things around very easily from one note to another just by shifting to another fret.  With our Major Scale, we need only start at another spot and use the same pattern to generate new Major Scales.  In future lessons, I will show some of the many different scale patterns or fingerings that exist.  These will come in handy.  For now, try to find different ways of fingering different Major Scales up and down the neck.

Note:  For ukuleles, major scale patterns can be a little restrictive in regards to the different ways you can finger them.  This is because most ukuleles are tuned in reintrant tuning and your primary strings for the pattern will be limited to three strings (the C, E, and A strings).  If you are using linear tuning (also known as low G tuning), then it will be easier to come up with multiple Root to Root scale patterns since you now have four strings to work with.  I'll try to shed some light on this in the later lesson.

~DB


* Some exceptions of this include mountain dulcimer.  There are others in more exotic music styles that do not follow this rule.  However, in general, this is true for fretted instruments.

Tuesday, October 11, 2011

Music Lesson 1: Chormatic Scale

So, for lesson one I'm going to start out at the bottom of music theory: The Chromatic Scale.  This scale encompasses all the notes in one big shot, but at the same time illustrates a lot of the relationships between the notes.

It is important to understand that everything you learn in music builds off of what you learned before.  Sometimes things don't need a specific order, but most things do.  The further you get out of order, the harder a concept will be.

For this lesson, we are going to use the root and key of C.  Roots and keys will be described in much more detail in later lessons.  For now, just understand that the key of C is the easiest for us to work with.

The chromatic scale uses every note between the root note (in this case, C) and it's octave (or the next time that note comes up in the scale).  So if we start at C, we work this way:


C C#DD#EFF# GG#AA#BC


This pattern is constant regardless of what root note you start with.  As we move from one note to another, each move is down by a half step.  The half step is the shortest distance between two notes*.  As an additional example, here is the chromatic scale for the Key of E (wheel use it later on the guitar):


EFF# GG#AA#BC C#DD#E


As you can see, we are also only using sharps (#) as we go up the scale.  It is also acceptable to use flats (b) instead of sharps.  However, we typically use sharps when we ascend (go up) the scale and flats when we descend (go back down).  Here is the same scale (in C) going down with flats:


C BBbAAbGGb FEEbDDbC


As you may notice, where there was a C# going up, we now have a Db.  That's because the sharp (#) makes the indicated note a half step higher and the flat (b) makes it a half step lower.  Since D comes after C, a Db is the same as a C#.

There is another thing to take note of with this scale.  Notice how the scale moves between E and F and also B and C.  Normally, on the scale, if move from one note to another, you would use a sharp (going up) or a flat (coming down) to go that half step between.  Well, there is not half step between E and F or B and C.

So, here is what you need to remember about this lesson:
  • Chromatic scales move one half step at a time from root to root (an octave).
  • When we move up, we sharpen the pitch so we use sharps (#).
  • When we move down, we flatten the pitch so we uses flats (b).
  • A Bb and an A# are the same pitch (as are other flat/sharp neighbors).

The practical side


Now we need to take this knowledge to the fretboard.  For ukuleles, we will use the C chromatic scale, for guitars we will use the E chromatic scale.

Notice as you work your way up and down the fretboard chromatically, you are also only moving one fret at a time.  This is because on fretted instruments (this includes the guitar) each fret represents one half step.

Now lets look at switching to a different strings instead of staying on one.


This is a good illustration of how tuning your ukulele or guitar to itself works.  As you can see, the notes blend themselves into the next string.

Finally, here are both fretboards laid out up to the twelfth fret with all of the notes.  Try to start at one note and work your way up and down the fretboard doing a full chromatic scale.

Now that you have a good understanding of the chromatic scale, we will move on to the next part of music which is tones and semitones.  We'll use this scale to do so, so make sure you know how it works before moving on.

~DB

* When I talk about music, I talk about western music (as opposed to Eastern or African or Tribal music).  In this case, there are some instances in other forms of music that use steps that we would call quarter or even smaller.  But for our purposes, we assume that a half step is the smallest.

Guitar and Ukulele Tuning

Tuning your instrument is one of the first skills you should master when learning how to play.  If you are lucky, you'll pick an instrument like piano that has to be tuned by a professional and therefore gets you off the hook of learning.  But, you probably aren't that lucky since you are here to learn.

I'm putting guitar and ukulele in the same lesson for one simple reason:  They share a lot in how you tune.  I say that for those who start on one instrument and then move to the other.  Many a guitarist has picked up a ukulele, felt completely baffled, and put it back down usually muttering some immature notion such as "those are cute toys."  (If you say that, I will unfriend you.)

Lets start with guitar.  Standard guitar tuning is E A D G B E (from low to high).  You can use an acronym to  remember the tuning if you would like.  I like the one "Elephants And Donkeys Grow Big Ears".  Now, for tuning, we always want to start at the lowest note (fattest string) and work our way up. (This is because the bass supports the rest of the music.)  See below for more info on how to get that first note tuned.

Now, once you have that first note tuned, you can use the guitar to tune itself.  This is a very useful method for not only quick tuning between songs, but also for developing you ear to hear different tones.  First, count up five frets from the nut on the low E string and strum that note. This will be the note A that you should tune the next string to.  You can count up this way to get the notes for the next few strings too.  But, once you get to tuning the B string, you need to count up only four (not five) to do this.  For the last string, count up five from the not on B string.  Here's a diagram:


Ukulele

Ukulele is only a little different.  We can still use the same idea to tune it to itself, we are just going to use different pitches.  Now, at this point, it is important to point out something that usually throws a few people off.  The ukulele has several different options when tuning.  The standard tuning is what we call C6 tuning.  However, even the standard has two flavors: linear and re-entrant.

Linear tuning means that we tune all of the strings in order from low to high.

Re-entrant tuning means that we start with a higher string, then go down to a lower string and proceed up the scale. Five string banjo also uses this type of tuning.  This tuning also gives ukuleles the characteristic "My Dog Has Fleas" sound.

Whether lenear or Re-entrant, the order of notes is the same in C6 tuning (which we will refer to as standard tuning).  The notes are G C E A.  The G string is the one which we either tune low (linear) or high (re-entrant).

Since re-entrant is the most common tuning, I will show you how to do "self-tuning" in that style.  First, we want to tune our lowest string which will be not the G, but the C string (again, see below for tips on getting that note tuned).  Then, we count up 4 frets to get the note for the next string which is E.

Now we will regress to tuning the G string (which we skipped).  Count up 3 frets from the nut on the E string will give us the G we are looking for.  Once you have that in tune, count up the E string two more (a total of 5 from the nut) and you have your A for the A string.

Here is a diagram:

Tuners

Seventy years ago, there weren't many options for tuning an instrument. You usually found a piano or other instrument that you could tune to.  If you were the typical upper middle class home, you'd just use the piano.  If you were in poverty, you did your best to tune it by ear.  Now-a-days, though, there are tons of options for tuning your instrument.
A Guitar Pitch Pipe

The first is still old school, but I highly recommend it for reasons of training your ears.  A pitch pipe as they are called can be bought for whatever instrument you are tuning or even a chromatic one with several pitches.  You simply blow on the desired pitch and tune the instrument by ear.  Most came with multiple pitches so you didn't have to tune the instrument against itself.  Aside from needing to tune by ear, the downside is that if the pitch pipe was out of tune, your instrument was out of tune.

There are also several websites that have "online" pitch pipes.  This can be a good option if you have speakers and often play in front of your monitor.

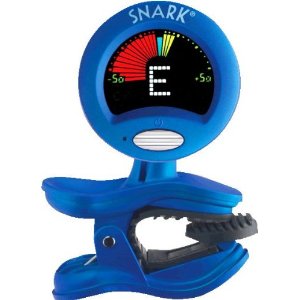
Snark Clip On Tuner
In our electronic age, the best method is the electronic tuner.  Twenty years ago, electronic tuners were still in their adolescence and relied on a poorly constructed microphones to pick up the sound your instrument made.  They progressed to plug in ones for electrified instruments, but those got expensive quick.  As digital electronics got better and better, the clip on tuners have hit the scene and changed the way we tune.

Clip on tuners can run from $10 up to $250 depending on who made them and if the come with any other functions or extras.  My experience is that a $20 or $30 tuner will last a lifetime if not abused and get you as in tune as you need. 

However, if you play an electrified instrument two options outside of the clip on are a tuner that you can plug in to the output cable or an on-board tuner.  The "in-line" tuners are great if you are already using effects petals.  It makes tuning pretty simple and can even help by "turning off" your instrument.  The on-board tuners are tuners added directly to your instruments on-board electronics.  They aren't available to every instrument, but are a wise upgrade if you are buying a new instrument from the factory.

So, that's all I have to say on tuning in this lesson.  As I mentioned before, mastering tuning is a critical step to mastering any instrument.  I highly recommend you learn not only how to use electronic gadgets, but also how to tune by ear.  The better you can recognize that you are in tune by ear, the easier it will be to know you are out of tune.